From Legacy Wiki
(→Chapter 1: The Beginning: Corrected drop for BP Jacket and added Phantom Essence info from xp2n) |
(→Chapter 4: Prison Break-in) |
||
| (21 intermediate revisions by 2 users not shown) | |||
| Line 136: | Line 136: | ||
| colspan = 6 style="background:#111111; border:1px solid black;" width="100%"| '''Possible loot''' | | colspan = 6 style="background:#111111; border:1px solid black;" width="100%"| '''Possible loot''' | ||
|- | |- | ||
| − | | colspan = 6 style="background:#222222; border:1px solid black;"| [[image:Smlargemed.png|Messenger / Masked Thug|link=Large Medicine]] [[image:Smrevive.png|Messenger|link=Revival Kit]] [[image:Padded_jacket.png| | + | | colspan = 6 style="background:#222222; border:1px solid black;"| [[image:Smlargemed.png|Messenger / Masked Thug|link=Large Medicine]] [[image:Smrevive.png|Messenger|link=Revival Kit]] [[image:Padded_jacket.png|Chief Thug|link=Padded Jacket]] [[image:Shotgun.png|Masked Thug|link=Shotgun]] [[image:Knuckle_duster.png|Masked Thug / Chief Thug|link=Knuckle Duster]] [[image:Flame_thrower.png|Messenger|link=Flame Thrower]] [[image:Expired_card.png|Chief Thug|link=Expired Card]] [[image:Samurai_armor.png|Messenger|link=Samurai Armor]] [[image:Rapier.png|Messenger|link=Rapier]]<br><sub>'''Hover over icon to see who drops each item.'''</sub> |
|- | |- | ||
| colspan = 6 style="background:#111111; border:1px solid black;" width="100%"| Trinkets | | colspan = 6 style="background:#111111; border:1px solid black;" width="100%"| Trinkets | ||
| Line 188: | Line 188: | ||
| colspan = 6 style="background:#111111; border:1px solid black;" width="100%"| '''Possible loot''' | | colspan = 6 style="background:#111111; border:1px solid black;" width="100%"| '''Possible loot''' | ||
|- | |- | ||
| − | | colspan = 6 style="background:#222222; border:1px solid black;"| [[image:Smlargemed.png|Big Al|link=Large Medicine]] [[image:Small_first_aid_kit.png|Big Al|link=Small First Aid Kit]] <br><sub>'''Hover over icon to see who drops each item.'''</sub> | + | | colspan = 6 style="background:#222222; border:1px solid black;"| [[image:Smsmallmed.png|Big Al|link=Small Medicine]] [[image:Smlargemed.png|Big Al|link=Large Medicine]] [[image:Small_first_aid_kit.png|Big Al|link=Small First Aid Kit]] [[image:Tommy_gun.png|Big Al|link=Tommy Gun]] <br><sub>'''Hover over icon to see who drops each item.'''</sub> |
|- | |- | ||
| colspan = 6 style="background:#111111; border:1px solid black;" width="100%"| Trinkets | | colspan = 6 style="background:#111111; border:1px solid black;" width="100%"| Trinkets | ||
| Line 239: | Line 239: | ||
| colspan = 6 style="background:#111111; border:1px solid black;" width="100%"| '''Possible loot''' | | colspan = 6 style="background:#111111; border:1px solid black;" width="100%"| '''Possible loot''' | ||
|- | |- | ||
| − | | colspan = 6 style="background:#222222; border:1px solid black;"| [[image:Smsmallmed.png|Big Al / Zaphar|link=Small Medicine]] [[image:Smlargemed.png|Riot Policeman / Riot Captain / Messenger / Big Al / Zaphar|link=Large Medicine]] [[image:Small_first_aid_kit.png|Big Al / Zaphar|link=Small First Aid Kit]] [[image:Smrevive.png|Cybil / Riot Policeman / Riot Captain|link=Revival Kit]] [[image:Laser_Sight.png|Cybil|link=Laser Sight]] [[image:Avatblood.png|Cybil|link=Avatar Blood]] [[image:Revolver.png|Big Al|link=Revolver]] [[image:Taser.png|Zaphar|link=Taser]] [[image:Throwing_blades.png|Cybil|link=Throwing Blades]] [[image:Operation_code_b.png|Cybil|link=Operation Code B]] [[image:Apparel_kit.png|Big Al|link=Apparel Kit]]<br><sub>'''Hover over icon to see who drops each item.'''</sub> | + | | colspan = 6 style="background:#222222; border:1px solid black;"| [[image:Antibiotics.png|Big Al|link=Antibiotics]][[image:Smsmallmed.png|Big Al / Zaphar|link=Small Medicine]] [[image:Smlargemed.png|Riot Policeman / Riot Captain / Messenger / Big Al / Zaphar|link=Large Medicine]] [[image:Small_first_aid_kit.png|Big Al / Zaphar|link=Small First Aid Kit]] [[image:Smrevive.png|Cybil / Riot Policeman / Riot Captain|link=Revival Kit]] [[image:Wires.png|Cybil|link=Wires]] [[image:Laser_Sight.png|Cybil|link=Laser Sight]] [[image:Avatblood.png|Cybil|link=Avatar Blood]] |
| + | |||
| + | [[image:Crossbow.png|Riot Policeman|link=Crossbow]] [[image:Revolver.png|Big Al|link=Revolver]] [[image:Taser.png|Zaphar|link=Taser]] [[image:Police_shield.png|Zaphar|link=Police Shield]] [[image:Tommy_gun.png|Big Al|link=Tommy Gun]] [[image:Samurai_armor.png|Big Al|link=Samurai Armor]] [[image:Rapier.png|Messenger|link=Rapier]] [[image:Throwing_blades.png|Cybil|link=Throwing Blades]] [[image:Operation_code_b.png|Cybil|link=Operation Code B]] [[image:Apparel_kit.png|Big Al|link=Apparel Kit]]<br><sub>'''Hover over icon to see who drops each item.'''</sub> | ||
|- | |- | ||
| colspan = 6 style="background:#111111; border:1px solid black;" width="100%"| Trinkets | | colspan = 6 style="background:#111111; border:1px solid black;" width="100%"| Trinkets | ||
| Line 340: | Line 342: | ||
| colspan = 6 style="background:#111111; border:1px solid black;" width="100%"| '''Possible loot''' | | colspan = 6 style="background:#111111; border:1px solid black;" width="100%"| '''Possible loot''' | ||
|- | |- | ||
| − | | colspan = 6 style="background:#222222; border:1px solid black;"| [[image:Avatblood.png| | + | | colspan = 6 style="background:#222222; border:1px solid black;"| [[image:Avatblood.png|Aberration / King Behemoth|link=Avatar Blood]] [[image:Brotherhood serum.png|Aberration / King Behemoth|link=Brotherhood Serum]] [[image:Phantom_essence.png|Aberration|link=Phantom Essence]] [[image:Aberrant_dye.png|Aberration|link=Aberrant Dye]] [[image:Cabrusion_crystal.png|King Behemoth|link=Cabrusion Crystal]]<br><sub>Hover over icon to see who drops each item.</sub> |
|- | |- | ||
| colspan = 6 style="background:#111111; border:1px solid black;" width="100%"| Trinkets | | colspan = 6 style="background:#111111; border:1px solid black;" width="100%"| Trinkets | ||
| Line 498: | Line 500: | ||
| colspan = 6 style="background:#111111; border:1px solid black;" width="100%"| '''Possible loot''' | | colspan = 6 style="background:#111111; border:1px solid black;" width="100%"| '''Possible loot''' | ||
|- | |- | ||
| − | | colspan = 6 style="background:#222222; border:1px solid black;"| | + | | colspan = 6 style="background:#222222; border:1px solid black;"| [[image:Charcoal.png|Mimic|link=Charcoal]] [[image:Flour.png|Mimic|link=Flour]] [[image:Pie_mix.png|Mimic|link=Pie Mix]] [[image:Fire_Crystal_Shard.png|Shadow Krampus|link=Fire Crystal Shard]] [[image:Bronze_ticket.png|Gift Box|link=Bronze Ticket]] [[image:Silver_ticket.png|Gift Box|link=Silver Ticket]] [[image:Power_cell.png|Shadow Krampus|link=Power Cell]] [[image:Mini_moo_juice.png|Abominus / Shadow Krampus|link=Mini Moo Juice]] [[image:Abstruse_Crystal_sm.png|Frost Knight|link=Abstruse Crystal]][[image:Aberrant dye.png|Shadow Klauz|link=Aberrant Dye]] [[image:Snow_boom.png|Shadow Krampus (120 Min)|link=Snow Boom]] [[image:Sweet_embrace.png|Shadow Krampus (120 Min)|link=Sweet Embrace]]<br><sub>Hover over icon to see who drops each item.</sub> |
|- | |- | ||
| colspan = 6 style="background:#111111; border:1px solid black;" width="100%"| Trinkets | | colspan = 6 style="background:#111111; border:1px solid black;" width="100%"| Trinkets | ||
| Line 505: | Line 507: | ||
|} | |} | ||
| − | ====A Very Merry Realm==== | + | ====A Very Not Merry Realm==== |
{|class width="80%" cellpadding=5 style="margin: auto; border-collapse:collapse; text-align:center;" | {|class width="80%" cellpadding=5 style="margin: auto; border-collapse:collapse; text-align:center;" | ||
|- | |- | ||
| − | | style="background:#111111; border:1px solid black;" width="100%"| '''A Very Merry Realm [Level 70]''' | + | | style="background:#111111; border:1px solid black;" width="100%"| '''A Very Not Merry Realm [Level 70]''' |
|- | |- | ||
| − | | style="background:#222222; border:1px solid black;" width="100%"| [[Image: | + | | style="background:#222222; border:1px solid black;" width="100%"| [[Image:A_Very_Not_Merry_Realm.png|A Very Not Merry Realm|link=A Very Not Merry Realm]] <br><sub><font color=yellow>'''Click image for Raid Guide'''</font></sub> |
|} | |} | ||
{|class="wikitable mw-collapsible mw-collapsed" width="80%" cellpadding=5 style="margin: auto; border-collapse:collapse; text-align:center;" | {|class="wikitable mw-collapsible mw-collapsed" width="80%" cellpadding=5 style="margin: auto; border-collapse:collapse; text-align:center;" | ||
| Line 517: | Line 519: | ||
| colspan = 6 style="background:#111111; border:1px solid black;"| | | colspan = 6 style="background:#111111; border:1px solid black;"| | ||
|- | |- | ||
| − | | colspan = 6 style="background:#222222; border:1px solid black; padding-left: 12em; padding-right: 12em; text-align:left"| ''An unidentified flying object that previously crashed just outside the hive was identified to be a sleigh. When you went to investigate, you found a heavily injured little elf. His last words were | + | | colspan = 6 style="background:#222222; border:1px solid black; padding-left: 12em; padding-right: 12em; text-align:left"| ''An unidentified flying object that previously crashed just outside the hive was identified to be a sleigh. When you went to investigate, you found a heavily injured little elf. His last words were "Ride the sleigh and save us from him.. from the fake Santa."'' |
|- | |- | ||
| colspan = 2 style="width:33%; background:#111111; border:1px solid black;"| '''Prerequisite''' | | colspan = 2 style="width:33%; background:#111111; border:1px solid black;"| '''Prerequisite''' | ||
| Line 527: | Line 529: | ||
| colspan = 6 style="background:#111111; border:1px solid black;"| '''Default reward''' | | colspan = 6 style="background:#111111; border:1px solid black;"| '''Default reward''' | ||
|- | |- | ||
| − | | colspan = 3 style="background:#222222; border:1px solid black;"| | + | | colspan = 3 style="background:#222222; border:1px solid black;"| 15,000 experience |
| − | | colspan = 3 style="background:#222222; border:1px solid black;"| | + | | colspan = 3 style="background:#222222; border:1px solid black;"| 50 credits |
|- | |- | ||
| colspan = 2 style="width:33%; background:#111111; border:1px solid black;"| '''Frequency''' | | colspan = 2 style="width:33%; background:#111111; border:1px solid black;"| '''Frequency''' | ||
| Line 548: | Line 550: | ||
| colspan = 6 style="background:#111111; border:1px solid black;" width="100%"| '''Possible loot''' | | colspan = 6 style="background:#111111; border:1px solid black;" width="100%"| '''Possible loot''' | ||
|- | |- | ||
| − | | colspan = 6 style="background:#222222; border:1px solid black;"| [[image:Charcoal.png|Mimic|link=Charcoal]] [[image:Artificial_Wood.png|Nutcracker|link=Artificial Wood]] [[image:Pie_mix.png|Little Helper | + | | colspan = 6 style="background:#222222; border:1px solid black;"| [[image:Charcoal.png|Mimic|link=Charcoal]] [[image:Artificial_Wood.png|Nutcracker|link=Artificial Wood]] [[image:Pie_mix.png|Little Helper / Mimic|link=Pie Mix]] [[image:flour.png|Little Helper / Mimic|link=Flour]] [[image:Fire_Crystal_Fragment.png|Rudolph|link=Fire Crystal Fragment]] [[image:Fire_Crystal_Shard.png|Rudolph / Krampus|link=Fire Crystal Shard]] [[image:Small_Fire_Crystal.png|Rudolph|link=Small Fire Crystal]] [[image:Abyss_crystal_fragment.png|Granny Heggs|link=Abyss Crystal Fragment]] [[image:Box_of_aldohs.png|Granny Heggs|link=Box Of Aldohs]] [[image:Epic blueprint.png|Granny Heggs|link=Epic Blueprint]] [[image:Large_power_cell.png|Klaus|link=Large Power Cell]] [[image:Mini moo juice.png|Klauz / Abominus Rex|link=Mini Moo Juice]] |
| + | [[image:Abstruse Crystal sm.png|Frost Knight|link=Abstruse Crystal]] [[image:Powercoreicon.png|Granny Heggs|link=Power Core]] [[image:Toolbox.png|Granny Heggs|link=Toolbox]] [[image:Amulet.png|Granny Heggs|link=Amulet]] [[image:Crystal20sword.png|Granny Heggs|link=Crystal Sword]] [[image:Rail20gun.png|Granny Heggs|link=Rail Gun]] [[image:Crystal bombs.png|Granny Heggs|link=Crystal Bombs]] [[image:Phantom_essence.png|Krampus|link=Phantom Essence]] [[image:Aberrant dye.png|Granny Heggs / Krampus|link=Aberrant Dye]] [[image:Snow_boom.png|Klauz / Shadow Krampus / Abominus Rex|link=Snow Boom]] [[image:Sweet_embrace.png|Klauz / Shadow Krampus|link=Sweet Embrace]] [[image:Alypss_armor.png|Granny Heggs|link=Alypss Armor]] <br><sub>Hover over icon to see who drops each item.</sub> | ||
|- | |- | ||
| colspan = 6 style="background:#111111; border:1px solid black;" width="100%"| Trinkets | | colspan = 6 style="background:#111111; border:1px solid black;" width="100%"| Trinkets | ||
| Line 591: | Line 594: | ||
| colspan = 2 style="width:33%; background:#222222; border:1px solid black;"| Daily | | colspan = 2 style="width:33%; background:#222222; border:1px solid black;"| Daily | ||
| colspan = 2 style="width:33%; background:#222222; border:1px solid black;"| [[image:Miscballicon.png|Misc Ball|link=Misc Ball]] | | colspan = 2 style="width:33%; background:#222222; border:1px solid black;"| [[image:Miscballicon.png|Misc Ball|link=Misc Ball]] | ||
| + | | colspan = 2 style="width:33%; background:#222222; border:1px solid black;"| N/A | ||
| + | |- | ||
| + | | colspan = 2 style="width:33%; background:#222222; border:1px solid black;"| Weekly | ||
| + | | colspan = 2 style="width:33%; background:#222222; border:1px solid black;"| N/A | ||
| + | | colspan = 2 style="width:33%; background:#222222; border:1px solid black;"| N/A | ||
| + | |- | ||
| + | | colspan = 6 style="background:#111111; border:1px solid black;" width="100%"| '''Possible loot''' | ||
| + | |- | ||
| + | | colspan = 6 style="background:#222222; border:1px solid black;"| [[image:Artifact_axe.png|Artifact Axe (30 min)|link=Artifact Axe]] | ||
| + | |- | ||
| + | | colspan = 6 style="background:#111111; border:1px solid black;" width="100%"| Trinkets | ||
| + | |- | ||
| + | | colspan = 6 style="background:#222222; border:1px solid black;"| N/A | ||
| + | |} | ||
| + | |||
| + | ==No Longer Available== | ||
| + | |||
| + | ====Unknown==== | ||
| + | |||
| + | {|class width="80%" cellpadding=5 style="margin: auto; border-collapse:collapse; text-align:center;" | ||
| + | |- | ||
| + | | style="background:#111111; border:1px solid black;" width="100%"| '''Unknown [Level 80]''' | ||
| + | |- | ||
| + | | style="background:#222222; border:1px solid black;" width="100%"| [[Image:Unknown.png|Unknown|link=Unknown]] <br><sub><font color=yellow>'''Click image for Raid Guide'''</font></sub> | ||
| + | |} | ||
| + | {|class="wikitable mw-collapsible mw-collapsed" width="80%" cellpadding=5 style="margin: auto; border-collapse:collapse; text-align:center;" | ||
| + | |- | ||
| + | | colspan = 6 style="background:#111111; border:1px solid black;"| | ||
| + | |- | ||
| + | | colspan = 6 style="background:#222222; border:1px solid black; padding-left: 12em; padding-right: 12em; text-align:left"| ''You were pulled into the void and suddenly appeared in what seems like the wasteland. But something is different.. explore to find answers.'' | ||
| + | |- | ||
| + | | colspan = 2 style="width:33%; background:#111111; border:1px solid black;"| '''Prerequisite''' | ||
| + | | colspan = 4 style="width:66%; background:#111111; border:1px solid black;"| '''Raid's cost''' | ||
| + | |- | ||
| + | | colspan = 2 style="width:33%; background:#222222; border:1px solid black;"| N/A | ||
| + | | colspan = 4 style="width:33%; background:#222222; border:1px solid black;"| N/A | ||
| + | |- | ||
| + | | colspan = 6 style="background:#111111; border:1px solid black;"| '''Default reward''' | ||
| + | |- | ||
| + | | colspan = 6 style="background:#222222; border:1px solid black;"| N/A | ||
| + | |- | ||
| + | | colspan = 2 style="width:33%; background:#111111; border:1px solid black;"| '''Frequency''' | ||
| + | | colspan = 2 style="width:33%; background:#111111; border:1px solid black;"| '''Reward''' | ||
| + | | colspan = 2 style="width:33%; background:#111111; border:1px solid black;"| '''Notes''' | ||
| + | |- | ||
| + | | colspan = 2 style="width:33%; background:#222222; border:1px solid black;"| Hourly | ||
| + | | colspan = 2 style="width:33%; background:#222222; border:1px solid black;"| N/A | ||
| + | | colspan = 2 style="width:33%; background:#222222; border:1px solid black;"| N/A | ||
| + | |- | ||
| + | | colspan = 2 style="width:33%; background:#222222; border:1px solid black;"| Daily | ||
| + | | colspan = 2 style="width:33%; background:#222222; border:1px solid black;"| N/A | ||
| colspan = 2 style="width:33%; background:#222222; border:1px solid black;"| N/A | | colspan = 2 style="width:33%; background:#222222; border:1px solid black;"| N/A | ||
|- | |- | ||
Latest revision as of 03:32, 8 April 2024
 |
Why | More Info | |
|---|---|---|---|
| "I wanted to add a new dimension of gameplay experience to legacy beyond just The Hive and Wasteland. The raid system serves this purpose of providing a new way to experience content and events in the game while also enabling us to expand on the lore in fun ways." - Aldo | Raids have their own forum on Legacy, you should post any questions not answered on Raids there. | ||
| What | Other Pages | ||
| A feature of Legacy. | Raids | Raid Vault | |
Aldo formally released raids on December 23rd 2018 with "A Very Merry Realm."
Raids work on a grid system, similar to the wasteland, where the player moves around, fights NPCs, and tries to complete comprehensive objectives.
If you are looking for what Raid Points are for, check Raids/Rewards.
This page will help guide you through raids, but if you have any further questions check the raid forum.
Contents
Basic Information
Controls
- Spacebar - attack first enemy in area presence list.
- Arrow keys / WASD - movement.
- E - use/interact with the current building/object on the square.
- Enter - highlights the chat box to type a message, pressing enter again will send and deselect the box.
Tips
- Raids don't consume energy while attacking or moving, but you may have to pay some as a cost to enter. Credits or other materials may also be required.
- Someone in a raid can't be attacked by someone who is in the hive or the wasteland.
- You can't be in a raid for longer than 30 minutes.
- Some raids reset hourly, daily, or weekly, and all raids have a cool-down at 30 minute intervals on server time.
- While NPCs can still drop item rewards when defeated, to receive that item you have to complete the raid and you'll see any items dropped on the rewards page.
- Leaving a raid before finishing an objective will mean you have to wait 5 minutes before entering another raid, subsequent leaving stacks another 5 minutes (to a max of 15 minutes.)
- Raids have their own page in the Hall of Records which has leaderboards for both number of completions and fastest completion times.
- Some raids disable item xp, others do not. Read the description to be sure.
- If you die or leave a public raid you can re-enter up to a certain point, however any xp or item drops will be lost.
- If you were in a public raid but die and it is completed before you rejoin you will not receive anything, include the hourly/daily/weekly rewards.
A Hive Legacy
Chapter 1: The Beginning
| Chapter 1: The Beginning [Level 10] | |||||
 Click image for Raid Guide |
| You find yourself in one of the seediest parts of the Hive: Sector 3. As you roam its back-alleys, you stumble upon something.. quite.. strange. | |||||
| Prerequisite | Raid's cost | ||||
| N/A | 50 energy | ||||
| Default reward | |||||
| 3,000 experience | 100 credits | 3 raid points | |||
| Frequency | Reward | Notes | |||
| Hourly | N/A | N/A | |||
| Daily | N/A | N/A | |||
| Weekly | N/A | N/A | |||
| Possible loot | |||||
| Hover over icon to see who drops each item. | |||||
Chapter 2: The Slammer
| Chapter 2: The Slammer [Level 15] |
 Click image for Raid Guide |
| You visit a station to meet Officer Rahpaz after having saved him from being assasinated during his investigation. Seems simple enough? | |||||
| Prerequisite | Raid's cost | ||||
| Complete Hive Legacy, Chapter 1: The Beginning | 50 energy | ||||
| Default reward | |||||
| 15,000 experience | 125 credits | 5 raid points | |||
| Frequency | Reward | Notes | |||
| Hourly | N/A | N/A | |||
| Daily | N/A | N/A | |||
| Weekly | N/A | N/A | |||
| Possible loot | |||||
| Hover over icon to see who drops each item. | |||||
| Trinkets | |||||
  Check Raid Guide for how to obtain Trinkets | |||||
Chapter 3: Say Hello to My Big Friend
| Chapter 3: Say Hello to My Big Friend [Level 20] |
 Click image for Raid Guide |
| While Rahpaz is recovering from his injuries, the expired card has led you to the Casino. Apparently, the mob runs it. And apparently, you are the wise guy (or gal) who's about to be given a run for your money. | |||||
| Prerequisite | Raid's cost | ||||
| Complete Hive Legacy, Chapter 2: The Slammer | 50 energy | 1x Expired Card | |||
| Default reward | |||||
| 18,000 experience | 100 credits | 5 raid points | |||
| Frequency | Reward | Notes | |||
| Hourly | N/A | N/A | |||
| Daily | N/A | N/A | |||
| Weekly | N/A | N/A | |||
| Possible loot | |||||
| Hover over icon to see who drops each item. | |||||
| Trinkets | |||||
   Check Raid Guide for how to obtain Trinkets | |||||
Chapter 4: Prison Break-in
| Chapter 4: Prison Break-in [Level 30] |
 Click image for Raid Guide |
| You discovered that the local mob boss, Big Al, had a meeting at the Hive Police HQ. The only way to figure out just what the hell is going on... is by breaking in. | |||||
| Prerequisite | Raid's cost | ||||
| Complete Hive Legacy, Chapter 3: Say Hello to My Big Friend |
50 energy | ||||
| Default reward | |||||
| 24,000 experience | 120 credits | 8 raid points | |||
| Frequency | Reward | Notes | |||
| Hourly | N/A | N/A | |||
| Daily | N/A | N/A | |||
| Weekly | N/A | N/A | |||
| Possible loot | |||||
|
| |||||
| Trinkets | |||||
  Check Raid Guide for how to obtain Trinkets | |||||
Strange Hives
Strange Hives I
| Strange Hives I [Level 50] |
 Click image for Raid Guide |
| Strange living structures have shown up just outside our hive. Gang headquarters that once remained dormant there have all suddenly disappeared and in their place, these strange hives remain. Hive Gatekeepers guard the path into this region but for a price, you might be able to get through. | |||||
| Prerequisite | Raid's cost | ||||
| N/A | 50 energy | ||||
| Default reward | |||||
| 35,000 experience | |||||
| Frequency | Reward | Notes | |||
| Hourly | N/A | N/A | |||
| Daily | 15,000 experience | N/A | |||
| Weekly | 30,000 experience | N/A | |||
| Possible loot | |||||
| Hover over icon to see who drops each item. | |||||
| Trinkets | |||||
| N/A | |||||
Strange Hives II
| Strange Hives II [Level 75] |
 Click image for Raid Guide |
| After investigating the first few strange hives that popped up, you realize that there is perhaps a much larger underground structure or network that is connected to the hives above the surface. The only thing left to do now is to jump right into the hole left behind one and figure out what secrets are inside. | |||||
| Prerequisite | Raid's cost | ||||
| N/A | 75 credits | 150 energy | |||
| Default reward | |||||
| 50,000 experience | |||||
| Frequency | Reward | Notes | |||
| Hourly | N/A | N/A | |||
| Daily | 30,000 experience | N/A | |||
| Weekly | 60,000 experience | N/A | |||
| Possible loot | |||||
| Hover over icon to see who drops each item. | |||||
| Trinkets | |||||
 Check Raid Guide for how to obtain Trinkets | |||||
Public Events
The Ritual
| The Ritual [Level 75] |
 Click image for Raid Guide |
| Strange cultist activity has been detected beyond the outskirts of the hive. | |||||
| Prerequisite | Raid's cost | ||||
| N/A | 25 energy | ||||
| Default reward | |||||
| N/A | |||||
| Frequency | Reward | Notes | |||
| Hourly | 10,000 experience | (Must be alive at end of Raid when it ends) | |||
| Daily | |
+10 AP, 3 Forge Points (Must be alive at end of Raid when it ends) | |||
| Weekly | |
(Must be alive at end of Raid when it ends) | |||
| Possible loot | |||||
| Hover over icon to see who drops each item. | |||||
| Trinkets | |||||
| N/A | |||||
Challenges
XP Challenge: War Machine
| XP Challenge: War Machine [Level 35] |
 Click image for Raid Guide |
| Rumors have surfaced of a new kind of combat technology in development at X-Corp. You decide to investigate what this technology is exactly. The rumors seem to refer to it as.. Project: War Machine. | |||||
| Prerequisite | Raid's cost | ||||
| N/A | 1x Key Chip | ||||
| Default reward | |||||
| 35,000 experience | |||||
| Frequency | Reward | Notes | |||
| Hourly | N/A | N/A | |||
| Daily | N/A | N/A | |||
| Weekly | N/A | N/A | |||
| Possible loot | |||||
| Hover over icon to see who drops each item. | |||||
| Trinkets | |||||
   Check Raid Guide for how to obtain Trinkets | |||||
Event Raids
Christmas
Snow Cones
| Snow Cones [Level 30] |
 Click image for Raid Guide |
| While exploring the frozen lake, you hear a strange jingle. The snow is coming down pretty hard but maybe you should investigate. | |||||
| Prerequisite | Raid's cost | ||||
| N/A | N/A | ||||
| Default reward | |||||
| 1,000 experience | 30 credits | ||||
| Frequency | Reward | Notes | |||
| Hourly | N/A | N/A | |||
| Daily | |
N/A | |||
| Weekly | N/A | N/A | |||
| Possible loot | |||||
| Hover over icon to see who drops each item. | |||||
| Trinkets | |||||
| N/A | |||||
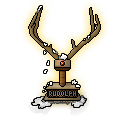
A Very Not Merry Realm
| A Very Not Merry Realm [Level 70] |
 Click image for Raid Guide |
| An unidentified flying object that previously crashed just outside the hive was identified to be a sleigh. When you went to investigate, you found a heavily injured little elf. His last words were "Ride the sleigh and save us from him.. from the fake Santa." | |||||
| Prerequisite | Raid's cost | ||||
| N/A | N/A | ||||
| Default reward | |||||
| 15,000 experience | 50 credits | ||||
| Frequency | Reward | Notes | |||
| Hourly | |
N/A | |||
| Daily | |
N/A | |||
| Weekly | |
N/A | |||
| Possible loot | |||||
|
| |||||
| Trinkets | |||||
   Check Raid Guide for how to obtain Trinkets | |||||
Halloween
The Return of Shadress
| The Return of Shadress [Level 75] |
 Click image for Raid Guide |
| Shadress is back... let's show her the door. | |||||
| Prerequisite | Raid's cost | ||||
| N/A | 50 energy | ||||
| Default reward | |||||
| N/A | |||||
| Frequency | Reward | Notes | |||
| Hourly | |
N/A | |||
| Daily | |
N/A | |||
| Weekly | N/A | N/A | |||
| Possible loot | |||||
| | |||||
| Trinkets | |||||
| N/A | |||||
No Longer Available
Unknown
| Unknown [Level 80] |
 Click image for Raid Guide |
| You were pulled into the void and suddenly appeared in what seems like the wasteland. But something is different.. explore to find answers. | |||||
| Prerequisite | Raid's cost | ||||
| N/A | N/A | ||||
| Default reward | |||||
| N/A | |||||
| Frequency | Reward | Notes | |||
| Hourly | N/A | N/A | |||
| Daily | N/A | N/A | |||
| Weekly | N/A | N/A | |||
| Possible loot | |||||
| N/A | |||||
| Trinkets | |||||
| N/A | |||||
History


On June 15th 2018 (over 6 months before its release) a preview of raids was made public.
This still can be started by talking to Ventrix through the hunting page.
Upon completing the teaser you will receive an "Observer cloak" for your character (pictured to the right,) also a title which reads "Observer."
Matt770 being the very first person to complete the teaser was given an unique title which reads "The First Observer."
The teaser is small and has a set path to take. Along that path there are a couple of static "enemies," they do not react or attack you but you can attack and defeat them.
Also as you progress forward you receive the following messages in the log of what's happening in the raid:
- This is your future.
- This is also your past.
- This is what you will become.
- We do not interfere.
- We only observe.
- But now you have observed.
- Will you interfere?
- Tell me...
- ..Observer.
At the end of the raid you meet Ventrix and have the option to "observe."
Further lore since has suggested this is Ventrix making you an Observer.