From Legacy Wiki
(→Chamber Guards) |
(→Test Subject 1: Aiden) |
||
| (48 intermediate revisions by 7 users not shown) | |||
| Line 37: | Line 37: | ||
'''''Note: Hunting drops chance decrease 10x if you are 10 levels or higher than the NPC you are hunting; this DOES NOT apply to Special Characters.''''' | '''''Note: Hunting drops chance decrease 10x if you are 10 levels or higher than the NPC you are hunting; this DOES NOT apply to Special Characters.''''' | ||
| + | |||
| + | '''''Note: The Hunting Boost can be bought from the Boon Ship in Sector 2 for 25 Boons. This will reduce the cost of hunting by 20% for 24 hours while the boost is active. | ||
===<b>'''Sewer Rats'''</b>=== | ===<b>'''Sewer Rats'''</b>=== | ||
| Line 76: | Line 78: | ||
| align="center" | Drops: | | align="center" | Drops: | ||
| − | [[Image:Cookie.png|Cookie]] | + | [[Image:Cookie.png|Cookie|link=Cookie]] |
| − | [[Image:Smpills.png|Antibiotics]] | + | [[Image:Smpills.png|Antibiotics|link=Antibiotics]] |
|} | |} | ||
| Line 102: | Line 104: | ||
| align="center" | Drops: | | align="center" | Drops: | ||
| − | [[Image:Smpills.png|Antibiotics]] | + | [[Image:Smpills.png|Antibiotics|link=Antibiotics]] |
| − | [[Image:Smsmallmed.png|Small Medicine]] | + | [[Image:Smsmallmed.png|Small Medicine|link=Small Medicine]] |
| − | [[Image:Knuckle_duster.png|link= | + | [[Image:Knuckle_duster.png|Knuckle Duster|link=Knuckle Duster]] |
|} | |} | ||
| Line 129: | Line 131: | ||
| align="center" | Drops: | | align="center" | Drops: | ||
| − | [[Image:Smrevive.png|Revival Kit]] | + | [[Image:Smrevive.png|Revival Kit|link=Revival Kit]] |
| − | [[Image:Smpills.png|Antibiotics]] | + | [[Image:Smpills.png|Antibiotics|link=Antibiotics]] |
| − | [[Image:Smsmallmed.png|Small Medicine]] | + | [[Image:Smsmallmed.png|Small Medicine|link=Small Medicine]] |
| − | [[Image:Shurikens.png|link= | + | [[Image:Shurikens.png|Shuriken|link=Shuriken]] |
| − | [[Image:Arm_blade.png|link= | + | [[Image:Arm_blade.png|Arm Blade|link=Arm Blade]] |
|} | |} | ||
| Line 158: | Line 160: | ||
| align="center" | Drops: | | align="center" | Drops: | ||
| − | [[Image: | + | [[Image:Smrevive.png|Revival Kit|link=Revival Kit]] |
| + | [[Image:Smlargemed.png|Large Medicine|link=Large Medicine]] | ||
| + | [[Image:Grenades.png|Grenades|link=Grenades]] | ||
|} | |} | ||
| Line 183: | Line 187: | ||
| align="center" | Drops: | | align="center" | Drops: | ||
| − | [[Image:Smrevive.png|Revival Kit]] | + | [[Image:Smrevive.png|Revival Kit|link=Revival Kit]] |
| − | [[Image:Smlargemed.png|Large Medicine]] | + | [[Image:Smlargemed.png|Large Medicine|link=Large Medicine]] |
| − | [[Image:Police_shield.png|link= | + | [[Image:Police_shield.png|Police Shield|link=Police Shield]] |
| − | [[Image:Crossbow.png| | + | [[Image:Crossbow.png|Crossbow|link=Crossbow]] |
|} | |} | ||
| Line 211: | Line 215: | ||
| align="center" | Drops: | | align="center" | Drops: | ||
| − | [[Image:Smrevive.png|Revival Kit]] | + | [[Image:Smrevive.png|Revival Kit|link=Revival Kit]] |
| − | [[Image:Smlargemed.png|Large Medicine]] | + | [[Image:Smlargemed.png|Large Medicine|link=Large Medicine]] |
| − | [[Image:Power_cell.png|Power Cell]] | + | [[Image:Power_cell.png|Power Cell|link=Power Cell]] |
| − | [[Image:Flame20thrower.png|link= | + | [[Image:Flame20thrower.png|Flame Thrower|link=Flame Thrower]] |
| − | [[Image:Rapier.png| | + | [[Image:Rapier.png|Rapier|link=Rapier]] |
|} | |} | ||
| Line 240: | Line 244: | ||
| align="center" | Drops: | | align="center" | Drops: | ||
| − | [[Image:Smrevive.png|Revival Kit]] | + | [[Image:Smrevive.png|Revival Kit|link=Revival Kit]] |
| − | [[Image:Small_first_aid_kit.png|Small First Aid Kit]] | + | [[Image:Small_first_aid_kit.png|Small First Aid Kit|link=Small First Aid Kit]] |
| − | [[Image:Shell_blade.png|link= | + | [[Image:Shell_blade.png|Shell Blade|link=Shell Blade]] |
| − | [[Image:Boomerang.png| | + | [[Image:Boomerang.png|Boomerang|link=Boomerang]] |
| − | [[Image:Spear_gun.png|link= | + | [[Image:Spear_gun.png|Spear Gun|link=Spear Gun]] |
|} | |} | ||
| Line 269: | Line 273: | ||
| align="center" | Drops: | | align="center" | Drops: | ||
| − | [[Image:Smrevive.png|Revival Kit]] | + | [[Image:Smrevive.png|Revival Kit|link=Revival Kit]] |
| − | [[Image:Small_first_aid_kit.png|Small First Aid Kit]] | + | [[Image:Small_first_aid_kit.png|Small First Aid Kit|link=Small First Aid Kit]] |
| − | [[Image:Sniper_rifle.png|link= | + | [[Image:Sniper_rifle.png|Sniper Rifle|link=Sniper Rifle]] |
|} | |} | ||
| Line 296: | Line 300: | ||
| align="center" | Drops: | | align="center" | Drops: | ||
| − | [[Image:Smrevive.png|Revival Kit]] | + | [[Image:Smrevive.png|Revival Kit|link=Revival Kit]] |
| − | [[Image:Small_first_aid_kit.png|Small First Aid Kit]] | + | [[Image:Small_first_aid_kit.png|Small First Aid Kit|link=Small First Aid Kit]] |
| − | [[Image:power_cell.png|Power Cell]] | + | [[Image:power_cell.png|Power Cell|link=Power Cell]] |
| − | [[Image:Target_headset.png|link= | + | [[Image:Target_headset.png|Target Headset|link=Target Headset]] |
| − | [[Image:Throwing_Axe.png|link= | + | [[Image:Throwing_Axe.png|Throwing Axe|link=Throwing Axe]] |
| − | [[Image:3_section_staff.png|link= | + | [[Image:3_section_staff.png|3 Section Staff|link=3 Section Staff]] |
|} | |} | ||
| Line 325: | Line 329: | ||
| align="center" | Drops: | | align="center" | Drops: | ||
| − | [[Image: | + | [[Image:Smrevive.png|Revival Kit|link=Revival Kit]] |
| − | [[Image:Submachine_gun.png|link= | + | [[Image:Small_first_aid_kit.png|Small First Aid Kit|link=Small First Aid Kit]] |
| + | [[Image:power_cell.png|Power Cell|link=Power Cell]] | ||
| + | [[Image:Polearm.png|Polearm|link=Polearm]] | ||
| + | [[Image:Submachine_gun.png|Submachine Gun|link=Submachine Gun]] | ||
|} | |} | ||
| Line 351: | Line 358: | ||
| align="center" | Drops: | | align="center" | Drops: | ||
| − | [[Image:Null_Crystal_Fragment.png|Null Crystal Fragment]] | + | [[Image:Null_Crystal_Fragment.png|Null Crystal Fragment|link=Null Crystal Fragment]] |
| − | [[Image: | + | [[Image:power_cell.png|Power Cell|link=Power Cell]] |
| − | [[Image: | + | [[Image:large_power_cell.png|Large Power Cell|link=Large Power Cell]] |
| − | [[Image:Wires.png|Wires]] | + | [[Image:Iron_Ore.png|Iron Ore|link=Iron Ore]] |
| − | [[Image: | + | [[Image:Wires.png|Wires|link=Wires]] |
| − | [[Image: | + | [[Image:Operation_code_a.png|Operation Code A|link=Operation Code A]]<br> |
| − | [[Image: | + | [[Image:Generic_blueprint.png|Generic Blueprint|link=Generic Blueprint]] |
| − | [[Image: | + | [[Image:Laser_Sight.png|Laser Sight|link=Laser Sight]] |
| + | [[Image:GPS.png|GPS Device|link=GPS Device]] | ||
| + | [[Image:Flame_turret.png|Flame Turret|link=Flame Turret]] | ||
| + | [[Image:Defense_pauldrons.png|Defense Pauldrons|link=Defense Pauldrons]] | ||
|} | |} | ||
| Line 366: | Line 376: | ||
|- style="width:100%; height: 10px;" align="center" | |- style="width:100%; height: 10px;" align="center" | ||
| − | | 40c || 34c || | + | | 40c || 34c || 17 || 23 |
|} | |} | ||
|} | |} | ||
| Line 375: | Line 385: | ||
| width="20%" align="center"| | | width="20%" align="center"| | ||
| − | [[Image:I_crystal.png|Crystal Entities']]<br/>Crystal Entities'<br/>Level | + | [[Image:I_crystal.png|Crystal Entities']]<br/>Crystal Entities'<br/>Level 78-80 |
| width="25%" align="center" bgcolor="#000001"| These entities exist in the same dimension as the Avatars, the crystals they are formed from hold great power. Crystal Entities can only be hunted by [[Avatar]]s. | | width="25%" align="center" bgcolor="#000001"| These entities exist in the same dimension as the Avatars, the crystals they are formed from hold great power. Crystal Entities can only be hunted by [[Avatar]]s. | ||
| Line 383: | Line 393: | ||
| align="center" | Drops: | | align="center" | Drops: | ||
| − | [[Image:Power_cell.png|Power Cell]] | + | [[Image:Power_cell.png|Power Cell|link=Power Cell]] |
| + | [[image:Abstruse_Crystal_sm.png|Abstruse Crystal|link=Abstruse Crystal]] | ||
| align="center" | Fragments: | | align="center" | Fragments: | ||
| − | [[Image:Green_Crystal_Fragment.png|link= | + | [[Image:Green_Crystal_Fragment.png|Green Crystal Fragment|link=Green Crystal Fragment]] |
| − | [[Image:Pink_Crystal_Fragment.png|link= | + | [[Image:Pink_Crystal_Fragment.png|Pink Crystal Fragment|link=Pink Crystal Fragment]] |
| − | [[Image:Fire_Crystal_Fragment.png|link= | + | [[Image:Fire_Crystal_Fragment.png|Fire Crystal Fragment|link=Fire Crystal Fragment]] |
| − | [[Image:Water_Crystal_Fragment.png|link= | + | [[Image:Water_Crystal_Fragment.png|Water Crystal Fragment|link=Water Crystal Fragment]] |
| − | [[Image:Air_Crystal_Fragment.png|link= | + | [[Image:Air_Crystal_Fragment.png|Air Crystal Fragment|link=Air Crystal Fragment]]<br> |
| − | + | [[Image:Null_Crystal_Fragment.png|Null Crystal Fragment|link=Null Crystal Fragment]] | |
| − | [[Image:Null_Crystal_Fragment.png|link= | + | [[Image:Yellow_Crystal_Fragment.png|Yellow Crystal Fragment|link=Yellow Crystal Fragment]] |
| − | [[Image:Yellow_Crystal_Fragment.png|link= | + | [[Image:Void_Crystal_Fragment.png|Void Crystal Fragment|link=Void Crystal Fragment]] |
| − | [[Image:Void_Crystal_Fragment.png|link= | + | [[Image:Orange_Crystal_Fragment.png|Orange Crystal Fragment|link=Orange Crystal Fragment]] |
| − | [[Image:Orange_Crystal_Fragment.png|link= | + | |
| align="center" | Shards: | | align="center" | Shards: | ||
| − | [[Image:Green_Crystal_Shard.png|link= | + | [[Image:Green_Crystal_Shard.png|Green Crystal Shard|link=Green Crystal Shard]] |
| − | [[Image:Pink_Crystal_Shard.png|link= | + | [[Image:Pink_Crystal_Shard.png|Pink Crystal Shard|link=Pink Crystal Shard]] |
| − | [[Image:Fire_Crystal_Shard.png|link= | + | [[Image:Fire_Crystal_Shard.png|Fire Crystal Shard|link=Fire Crystal Shard]] |
| − | [[Image:Water_Crystal_Shard.png|link= | + | [[Image:Water_Crystal_Shard.png|Water Crystal Shard|link=Water Crystal Shard]] |
| − | [[Image:Air_Crystal_Shard.png|link= | + | [[Image:Air_Crystal_Shard.png|Air Crystal Shard|link=Air Crystal Shard]]<br> |
| − | + | [[Image:Null_Crystal_Shard.png|Null Crystal Shard|link=Null Crystal Shard]] | |
| − | [[Image:Null_Crystal_Shard.png|link= | + | [[Image:Yellow_Crystal_Shard.png|Yellow Crystal Shard|link=Yellow Crystal Shard]] |
| − | [[Image:Yellow_Crystal_Shard.png|link= | + | [[Image:Void_Crystal_Shard.png|Void Crystal Shard|link=Void Crystal Shard]] |
| − | [[Image:Void_Crystal_Shard.png|link= | + | [[Image:Orange_Crystal_Shard.png|Orange Crystal Shard|link=Orange Crystal Shard]] |
| − | [[Image:Orange_Crystal_Shard.png|link= | + | |
|} | |} | ||
| Line 432: | Line 441: | ||
| align="center" | Drops: | | align="center" | Drops: | ||
| − | [[Image: | + | [[Image:Smrevive.png|Revival Kit|link=Revival Kit]] |
| − | [[Image:Avatblood.png|Avatar Blood]] | + | [[Image:Avatblood.png|Avatar Blood|link=Avatar Blood]] |
| − | [[Image:Throwing_blades.png|Throwing Blades]] | + | [[Image:Brotherhood_serum.png|Brotherhood Serum|link=Brotherhood Serum]] |
| − | [[Image:Operation_code_a.png|Operation Code A]] | + | [[Image:Wires.png|Wires|link=Wires]] |
| − | [[Image:Operation_code_b.png|Operation Code B]] | + | [[Image:Throwing_blades.png|Throwing Blades|link=Throwing Blades]] |
| − | [[Image:Operation_code_c.png|Operation Code C]] | + | [[Image:Operation_code_a.png|Operation Code A|link=Operation Code A]] |
| − | [[Image:Generic_blueprint.png|Generic Blueprint]] | + | [[Image:Operation_code_b.png|Operation Code B|link=Operation Code B]] |
| − | [[Image:Rare_blueprint.png|Rare Blueprint]] | + | [[Image:Operation_code_c.png|Operation Code C|link=Operation Code C]]<br> |
| − | [[Image: | + | [[Image:Generic_blueprint.png|Generic Blueprint|link=Generic Blueprint]] |
| − | [[Image: | + | [[Image:Rare_blueprint.png|Rare Blueprint|link=Rare Blueprint]] |
| − | [[Image:Aeon_amulet.png|link= | + | [[Image:Laser_Sight.png|Laser Sight|link=Laser Sight]] |
| + | [[Image:TModulesm.png|Targeting Module|link=Targeting Module]] | ||
| + | [[Image:Aeon_amulet.png|Aeon Amulet|link=Aeon Amulet]] | ||
|} | |} | ||
| Line 456: | Line 467: | ||
== "Brotherhood of Blood" Quest == | == "Brotherhood of Blood" Quest == | ||
| − | The first Legacy quest ever. Completing this gives a player high-level hunting options, such as Cerb, X-1025, | + | The first Legacy quest ever. Completing this gives a player high-level hunting options, such as Cerb, X-1025, Tyran, and Ventrix, as well as the 50+ hunting groups. To begin the quest, the 10,000c [[Chronicle of Blood]] must be purchased from [[Joe's Merchandise]] in Sector 3. The following NPCs can only be attainable through the Brotherhood of Blood quest: |
===<b>'''Guard Dogs'''</b>=== | ===<b>'''Guard Dogs'''</b>=== | ||
| Line 471: | Line 482: | ||
| align="center" | Drops: | | align="center" | Drops: | ||
| − | [[Image: | + | [[Image:Smrevive.png|Revival Kit|link=Revival Kit]] |
| − | [[Image:Avatblood.png|Avatar Blood]] | + | [[Image:Avatblood.png|Avatar Blood|link=Avatar Blood]] |
| + | [[Image:power_cell.png|Power Cell|link=Power Cell]] | ||
| + | [[Image:Iron_Ore.png|Iron Ore|link=Iron Ore]] | ||
| + | [[Image:Wires.png|Wires|link=Wires]] | ||
| + | [[Image:GPS.png|GPS Device|link=GPS Device]] | ||
|} | |} | ||
| Line 497: | Line 512: | ||
| align="center" | Drops: | | align="center" | Drops: | ||
| − | [[Image: | + | [[Image:Smrevive.png|Revival Kit|link=Revival Kit]] |
| − | [[Image: | + | [[Image:Avatblood.png|Avatar Blood|link=Avatar Blood]] |
| − | [[Image: | + | [[Image:Modded20pistol.png|Modded Pistol|link=Modded Pistol]] |
| + | [[Image:Grenade_launcher.png|Grenade Launcher|link=Grenade Launcher]] | ||
|} | |} | ||
| Line 524: | Line 540: | ||
| align="center" | Drops: | | align="center" | Drops: | ||
| − | [[Image: | + | [[Image:Smrevive.png|Revival Kit|link=Revival Kit]] |
| − | [[Image: | + | [[Image:Avatblood.png|Avatar Blood|link=Avatar Blood]] |
| − | [[Image: | + | [[Image:Blood20pack.png|Blood Pack|link=Blood Pack]] |
| + | [[Image:Javelin.png|Javelin|link=Javelin]] | ||
|} | |} | ||
| Line 551: | Line 568: | ||
| align="center" | Drops: | | align="center" | Drops: | ||
| − | [[Image: | + | [[Image:Smrevive.png|Revival Kit|link=Revival Kit]] |
| + | [[Image:Avatblood.png|Avatar Blood|link=Avatar Blood]] | ||
| + | [[Image:power_cell.png|Power Cell|link=Power Cell]] | ||
| + | [[Image:Iron Ore.png|Iron Ore|link=Iron Ore]] | ||
| + | [[Image:Wires.png|Wires|link=Wires]] | ||
| + | [[Image:Wrist20flamer.png|Wrist Flamer|link=Wrist Flamer]] | ||
|} | |} | ||
| Line 576: | Line 598: | ||
| align="center" | Drops: | | align="center" | Drops: | ||
| − | [[Image: | + | [[Image:Smrevive.png|Revival Kit|link=Revival Kit]] |
| − | [[Image:Avatblood.png|Avatar Blood]] | + | [[Image:Avatblood.png|Avatar Blood|link=Avatar Blood]] |
| − | [[Image: | + | [[Image:power_cell.png|Power Cell|link=Power Cell]] |
| − | + | [[Image:Special blueprint.png|Special Blueprint 1|link=Special Blueprint 1]] | |
| − | + | [[Image:Throwing20star.png|Throwing Star|link=Throwing Star]] | |
| − | [[Image: | + | |
| − | [[Image: | + | |
|} | |} | ||
| Line 607: | Line 627: | ||
| align="center" | Drops: | | align="center" | Drops: | ||
| − | [[Image: | + | [[Image:Smrevive.png|Revival Kit|link=Revival Kit]] |
| − | [[Image: | + | [[Image:Avatblood.png|Avatar Blood|link=Avatar Blood]] |
| − | [[Image: | + | [[Image:Brotherhood_serum.png|Brotherhood Serum|link=Brotherhood Serum]] |
| − | [[Image:Special blueprint.png|Special Blueprint | + | [[Image:Special blueprint.png|Special Blueprint 2|link=Special Blueprint 2]] |
| − | + | [[Image:Dual20sword.png|Dual Sword|link=Dual Sword]] | |
| − | | | + | |
| − | + | ||
| − | [[Image: | + | |
| − | + | ||
| − | + | ||
| − | + | ||
| − | + | ||
| − | + | ||
| − | + | ||
| − | + | ||
|} | |} | ||
| Line 649: | Line 659: | ||
| align="center" | Drops: | | align="center" | Drops: | ||
| − | [[Image: | + | [[Image:Avatblood.png|Avatar Blood|link=Avatar Blood]] |
| − | + | [[Image:brotherhood_serum.png|Brotherhood Serum|link=Brotherhood Serum]] | |
| − | + | [[Image:Small_golden_nugget.png|Small Golden Nugget|link=Small Golden Nugget]] | |
| − | + | [[Image:Mediumgoldnugg.png|Medium Golden Nugget|link=Medium Golden Nugget]] | |
| − | [[Image:brotherhood_serum.png|Brotherhood Serum]] | + | [[Image:Large_golden_nugget.png|Large Golden Nugget|link=Large Golden Nugget]] |
| − | [[Image:Small_golden_nugget.png|Small Golden Nugget]] | + | [[Image:Fire_Crystal_Fragment.png|Fire Crystal Fragment|link=Fire Crystal Fragment]] |
| − | [[Image:Mediumgoldnugg.png|Medium Golden Nugget]] | + | [[Image:Small_Fire_Crystal.png|Small Fire Crystal|link=Small Fire Crystal]] |
| − | [[Image:Large_golden_nugget.png|Large Golden Nugget]] | + | [[Image:Abyss_crystal.png|Abyss Crystal|link=Abyss Crystal]]<br> |
| − | + | [[Image:Special blueprint.png|Special Blueprint 3|link=Special Blueprint 3]] | |
| − | [[Image:Fire_Crystal_Fragment.png|link= | + | [[Image:Special blueprint.png|Special Blueprint 5|link=Special Blueprint 5]] |
| − | [[Image:Small_Fire_Crystal.png|link= | + | [[Image:Special blueprint.png|Special Blueprint 6|link=Special Blueprint 6]] |
| − | [[Image:Abyss_crystal.png|Abyss Crystal]] | + | [[Image:Void_axe.png|Void Axe|link=Void Axe]] |
| − | [[Image:Special blueprint.png|Special Blueprint | + | [[Image:Core_staff.png|Core Staff|link=Core Staff]] |
| − | [[Image:Special blueprint.png|Special Blueprint | + | [[Image:Core_shield.png|Core Shield|link=Core Shield]] |
| − | [[Image:Special blueprint.png|Special Blueprint | + | |
| − | + | ||
|} | |} | ||
| Line 678: | Line 686: | ||
== Hunting Special Characters == | == Hunting Special Characters == | ||
| − | In addition to hunting groups, you can also hunt special characters. You can only hunt these characters once every 7 days, and if you do not kill them in the fight, they immediately heal back to full health (so you cannot wear them down). Special characters are specific for everyone, meaning that even though your friend defeated one 5 minutes ago, you can still fight that character. Drop percentages have been decreased accordingly since more of the Special Characters will be defeated everyday. | + | In addition to hunting groups, you can also hunt special characters, commonly referred to as SNPCs. You can only hunt these characters once every 7 days, and if you do not kill them in the fight, they immediately heal back to full health (so you cannot wear them down). Special characters are specific for everyone, meaning that even though your friend defeated one 5 minutes ago, you can still fight that character. Drop percentages have been decreased accordingly since more of the Special Characters will be defeated everyday. |
'''''Note: The drops listed are not necessarily all the drops possible. They will also commonly drop health items like Revives Kits, Large Medicines, First Aid Kits, etc. just like normal NPCs.''''' | '''''Note: The drops listed are not necessarily all the drops possible. They will also commonly drop health items like Revives Kits, Large Medicines, First Aid Kits, etc. just like normal NPCs.''''' | ||
| − | '''''Note: All special NPCs from level 50 - 80 (Seraph, Cerb, Guardian: X-1025, and Tyran; excluding Shadow Hunter SPNCs) have a chance to drop a [[ | + | '''''Note: All special NPCs from level 50 - 80 (Seraph, Cerb, Guardian: X-1025, and Tyran; excluding Shadow Hunter SPNCs) have a chance to drop a [[Chaos Armor]]; this chance increases as the level of the NPC increases. Therefore, Seraph has the lowest chance of dropping a Chaos Armor, while Tyran has the highest chance.''''' |
'''''Note: The ability Fast Recovery reduces the wait to hunt special NPCs by 24 hours. This brings the wait down to 6 days, rather than the usual 7. The Hunting Boost, found in the Boosts section of the Platinum Store, reduces the wait to hunt Special NPCs by 24 hours. This, combined with the Fast Recovery ability, allows you to hunt Special NPCs every 5 days. | '''''Note: The ability Fast Recovery reduces the wait to hunt special NPCs by 24 hours. This brings the wait down to 6 days, rather than the usual 7. The Hunting Boost, found in the Boosts section of the Platinum Store, reduces the wait to hunt Special NPCs by 24 hours. This, combined with the Fast Recovery ability, allows you to hunt Special NPCs every 5 days. | ||
| + | |||
| + | '''''Note: The Hunting Pass can be bought from the Boon Ship in Sector 2 (for 60 boons) resets the special npc timer allowing you to hunt right away. | ||
===<b>'''Assassin: Lisha'''</b>=== | ===<b>'''Assassin: Lisha'''</b>=== | ||
| Line 698: | Line 708: | ||
| align="center" | Drops: | | align="center" | Drops: | ||
| − | [[Image: | + | [[Image:Smrevive.png|Revival Kit|link=Revival Kit]] |
| − | [[Image:Dagger.png| | + | [[Image:Smpills.png|Antibiotics|link=Antibiotics]] |
| + | [[Image:Smsmallmed.png|Small Medicine|link=Small Medicine]] | ||
| + | [[Image:Smlargemed.png|Large Medicine|link=Large Medicine]] | ||
| + | [[Image:Small_first_aid_kit.png|Small First Aid Kit|link=Small First Aid Kit]] | ||
| + | [[Image:Throwing_knives.png|Throwing Knives|link=Throwing Knives]] | ||
| + | [[Image:Dagger.png|Dagger|link=Dagger]] | ||
|} | |} | ||
| Line 724: | Line 739: | ||
| align="center" | Drops: | | align="center" | Drops: | ||
| − | [[Image: | + | [[Image:Smrevive.png|Revival Kit|link=Revival Kit]] |
| − | [[Image:Tommy_gun.png|link= | + | [[Image:Smpills.png|Antibiotics|link=Antibiotics]] |
| + | [[Image:Smsmallmed.png|Small Medicine|link=Small Medicine]] | ||
| + | [[Image:Smlargemed.png|Large Medicine|link=Large Medicine]] | ||
| + | [[Image:Small_first_aid_kit.png|Small First Aid Kit|link=Small First Aid Kit]] | ||
| + | [[Image:Revolver.png|Revolver|link=Revolver]] | ||
| + | [[Image:Tommy_gun.png|Tommy Gun|link=Tommy Gun]] | ||
|} | |} | ||
| Line 750: | Line 770: | ||
| align="center" | Drops: | | align="center" | Drops: | ||
| − | [[Image: | + | [[Image:Smrevive.png|Revival Kit|link=Revival Kit]] |
| − | [[Image:M16.png| | + | [[Image:Smpills.png|Antibiotics|link=Antibiotics]] |
| − | [[Image:Swat_shield.png|link= | + | [[Image:Smsmallmed.png|Small Medicine|link=Small Medicine]] |
| + | [[Image:Smlargemed.png|Large Medicine|link=Large Medicine]] | ||
| + | [[Image:Small_first_aid_kit.png|Small First Aid Kit|link=Small First Aid Kit]] | ||
| + | [[Image:Taser.png|Taser|link=Taser]] | ||
| + | [[Image:M16.png|M16|link=M16]] | ||
| + | [[Image:Swat_shield.png|Swat Shield|link=Swat Shield]] | ||
|} | |} | ||
| Line 777: | Line 802: | ||
| align="center" | Drops: | | align="center" | Drops: | ||
| − | [[Image: | + | [[Image:Smrevive.png|Revival Kit|link=Revival Kit]] |
| − | [[Image:Heavy_flamethrower.png|link= | + | [[Image:Smpills.png|Antibiotics|link=Antibiotics]] |
| + | [[Image:Smsmallmed.png|Small Medicine|link=Small Medicine]] | ||
| + | [[Image:Smlargemed.png|Large Medicine|link=Large Medicine]] | ||
| + | [[Image:Small_first_aid_kit.png|Small First Aid Kit|link=Small First Aid Kit]] | ||
| + | [[Image:Minigun.png|Minigun|link=Minigun]] | ||
| + | [[Image:Heavy_flamethrower.png|Heavy Flame Thrower|link=Heavy Flame Thrower]] | ||
|} | |} | ||
| Line 803: | Line 833: | ||
| align="center" | Drops: | | align="center" | Drops: | ||
| − | [[Image:Artifact20ring.png|link= | + | [[Image:Artifact20ring.png|Artifact Ring|link=Artifact Ring]] |
| − | [[Image:Artifact_Dagger.png|link= | + | [[Image:Artifact_Dagger.png|Artifact Dagger|link=Artifact Dagger]] |
| − | [[Image:Deathbringer.png|link= | + | [[Image:Deathbringer.png|Deathbringer|link=Deathbringer]] |
| + | [[Image:Chaos_armor.png|Chaos Armor|link=Chaos Armor]] | ||
|} | |} | ||
| Line 830: | Line 861: | ||
| align="center" | Drops: | | align="center" | Drops: | ||
| − | [[Image: | + | [[Image:Smrevive.png|Revival Kit|link=Revival Kit]] |
| − | [[Image:Razor20bow.png|link= | + | [[Image:Smpills.png|Antibiotics|link=Antibiotics]] |
| − | [[Image:Chaos_armor.png|link= | + | [[Image:Smsmallmed.png|Small Medicine|link=Small Medicine]] |
| + | [[Image:Smlargemed.png|Large Medicine|link=Large Medicine]] | ||
| + | [[Image:Small_first_aid_kit.png|Small First Aid Kit|link=Small First Aid Kit]] | ||
| + | [[Image:Mace.png|Mace|link=Mace]] | ||
| + | [[Image:Razor20bow.png|Razor Bow|link=Razor Bow]] | ||
| + | [[Image:Chaos_armor.png|Chaos Armor|link=Chaos Armor]] | ||
|} | |} | ||
| Line 857: | Line 893: | ||
| align="center" | Drops: | | align="center" | Drops: | ||
| − | [[Image: | + | [[Image:Smlargemed.png|Large Medicine|link=Large Medicine]] |
| − | [[Image:Barrage_launcher.png|link= | + | [[Image:Small_first_aid_kit.png|Small First Aid Kit|link=Small First Aid Kit]] |
| − | [[Image:Radiation20cannon.png|link= | + | [[Image:power_cell.png|Power Cell|link=Power Cell]] |
| − | [[Image:Beam20sword.png|link= | + | [[Image:Defense20bot.png|Defense Bot|link=Defense Bot]] |
| − | [[Image:Chaos_armor.png|link= | + | [[Image:Barrage_launcher.png|Barrage Launcher|link=Barrage Launcher]] |
| + | [[Image:Radiation20cannon.png|Radiation Cannon|link=Radiation Cannon]] | ||
| + | [[Image:Beam20sword.png|Beam Sword|link=Beam Sword]] | ||
| + | [[Image:Chaos_armor.png|Chaos Armor|link=Chaos Armor]] | ||
|} | |} | ||
| Line 886: | Line 925: | ||
| align="center" | Drops: | | align="center" | Drops: | ||
| − | [[Image:Crystal20ring.png|link= | + | [[Image:Crystal20ring.png|Crystal Ring|link=Crystal Ring]] |
| − | [[Image:Chain_blade.png|link= | + | [[Image:Chain_blade.png|Chain Blade|link=Chain Blade]] |
| − | [[Image:Scythe.png|link= | + | [[Image:Scythe.png|Scythe|link=Scythe]] |
| − | [[Image:Chaos_armor.png|link= | + | [[Image:Chaos_armor.png|Chaos Armor|link=Chaos Armor]] |
| + | [[Image:Drone.png|Heavy Railguns|link=Heavy Railguns]] | ||
|} | |} | ||
| Line 914: | Line 954: | ||
| align="center" | Drops: | | align="center" | Drops: | ||
| − | [[Image:Rift_gun.png|link= | + | [[Image:Rift_gun.png|Rift Gun|link=Rift Gun]] |
| − | [[Image:Void_sword.png|link= | + | [[Image:Void_sword.png|Void Sword|link=Void Sword]] |
| − | [[Image:Prime_amulet.png|link= | + | [[Image:Prime_amulet.png|Prime Amulet|link=Prime Amulet]] |
| − | [[Image:Inferno_amulet.png|link= | + | [[Image:Inferno_amulet.png|Inferno Amulet|link=Inferno Amulet]] |
| + | [[Image:Special_blueprint.png|Crystal Maul|link=Crystal Maul Blueprint]] | ||
| align="center" | [[Crystal_System#General_Crystal_Information|Crystals]]: | | align="center" | [[Crystal_System#General_Crystal_Information|Crystals]]: | ||
| Line 942: | Line 983: | ||
| width="50%" align="center" | | | width="50%" align="center" | | ||
| − | {| width="100%" cellspacing="1" cellpadding="1" align="center" style="white-space: nowrap;" | | + | {| width="100%" cellspacing="1" cellpadding="1" align="center" style="white-space: nowrap;" | bgcolor="#000001" align="center" |
| − | | align="center | + | | align="center" | Drops: |
| − | [[Image:Focus_refill.png|Focus Refill]] | + | [[Image:Focus_refill.png|Focus Refill|link=Focus Refill]] |
| − | [[Image: | + | [[Image:Special blueprint.png|Special Blueprint 3|link=Special Blueprint 3]] |
| − | [[Image: | + | [[Image:Special blueprint.png|Special Blueprint 4|link=Special Blueprint 4]] |
| − | [[Image: | + | [[Image:Special blueprint.png|Special Blueprint 5|link=Special Blueprint 5]] |
| − | + | [[Image:Special blueprint.png|Special Blueprint 6|link=Special Blueprint 6]]<br> | |
| − | [[Image:Special blueprint.png|Special Blueprint | + | [[Image:Giant_void_crystal.png|Giant Void Crystal|link=Giant Void Crystal]] |
| − | [[Image: | + | [[Image:Scout_Drone.png|Scout Drones|link=Scout Drones]] |
| − | [[Image: | + | [[Image:Void_Bow.png|Void Bow|link=Void Bow]] |
| − | [[Image: | + | [[Image:Drone.png|Rapid Lasers|link=Rapid Lasers]] |
| + | [[Image:Maul_Head.png|Crystal Maul Head|link=Crystal Maul Head]] | ||
| − | |||
| − | |||
|} | |} | ||
| Line 975: | Line 1,015: | ||
[[Image:Aiden.png|Aiden]]<br/>Aiden<br/>Level 90 | [[Image:Aiden.png|Aiden]]<br/>Aiden<br/>Level 90 | ||
| − | | width="30%" align="center" bgcolor="#000001"| Not much is known about Aiden except that he may be the one spotted alongside Aida during her attacks on X-Corp facilities. There have been conflicting reports about the extent of his strange abilities but one thing is for certain - he is dangerous. | + | | width="30%" align="center" bgcolor="#000001"| Not much is known about Aiden except that he may be the one spotted alongside Aida during her attacks on X-Corp facilities. There have been conflicting reports about the extent of his strange abilities but one thing is for certain - he is dangerous. To find Aiden, go to the [[quests#Mini-Quests|quests]] page. |
| width="50%" align="center" | | | width="50%" align="center" | | ||
| Line 981: | Line 1,021: | ||
| align="center" | Drops: | | align="center" | Drops: | ||
| − | [[Image:Strange_journal.png|Strange Journal]] | + | [[Image:Strange_journal.png|Strange Journal|link=Strange Journal]] |
| − | [[Image: | + | [[Image:Special_blueprint.png|Godlike Blueprint|link=Godlike Blueprint]] |
| − | [[Image: | + | [[Image:Projector_bots.png|Projector Bots|link=Projector Bots]] |
| − | [[Image:Q15_gun.png|link= | + | [[Image:Q15_gun.png|Q15|link=Q15]] |
| − | [[Image:Havoc_launcher.png|link= | + | [[Image:Havoc_launcher.png|Havoc Launcher|link=Havoc Launcher]] |
| − | [[Image:Prototype_armor.png|link= | + | [[Image:Prototype_armor.png|Prototype Armor|link=Prototype Armor]] |
| − | [[Image: | + | [[Image:Maul_Shaft.png|Crystal Maul Shaft|link=Crystal Maul Shaft]] |
|} | |} | ||
Latest revision as of 01:17, 3 May 2024
| Purpose: Alternate to PVP |
|
Pros:
| |
Cons:
|
Contents
Hunting vs. PVP
Hunting is one of the two ways in Legacy to level up. The other way is Player vs. Player (PVP), which is quite different in many ways:
- Hunting costs credits. PVP is free.
- In addition to experience points, hunting certain NPCs can net you drops (such as a Flamethrower); however, you cannot earn reputation from hunting like you do in PvP.
- Hunting NPCs (non-playable characters, used to describe the enemies you hunt) can last forever as there is no end to the amount of NPCs (though special characters may only be hunted once per week), while attacking players is temporary. You can only attack a specific player once per day, and once you have killed a player, they don't come back as NPCs do.
In addition, there are two different types of hunting; NPC hunting and Special Character hunting.
Hunting History
Hunting was first created by Zorg in order for lower-leveled players with saved up money to be able to make use of the money. Awhile back, hunting was used heavily along with Double EXP to take advantage of the Double EXP weekend. This way, not only could players net a sometimes jaw-dropping amount of EXP with saved Credits, they could also snag a few drops if they were lucky (The chance of a NPC drop is very low). However, recently, Zorg has decided that the players saving tons of Credits up and then leveling way ahead of PVP-ers was not the way the game was supposed to be. So he removed Double EXP and changed Hunting to give only 80% EXP what PVP would give, and increased the daily revives from 2 to 4 in order to increase PVP traffic. A few weeks after the EXP levels were dropped to 80% they were returned to 100% again, and the cost of hunting was dropped by 5c at every level. This means that hunting Sewer Rats is now free. Today, hunting is still widely used for leveling up, although not as much as before.
Hunting Points
Each time you hunt an NPC/Special Character within 5 levels of you, you get Hunting Points. Hunting points add up weekly and if you are in the top 10 Hunting Points for that week, then you get a badge on your profile for that week and a permanent banner in your profiles honors. Hunting points are listed in with the hunting NPC's below.
Hunting NPCs
There currently are 11 possible types of NPCs to hunt; mostly in level increments of 5. All of the NPCs can also drop health items such as: Antibiotics, Small Medicine, Large Medicine, First Aid Kits and Revive Kits. For more information about hunting drops, see the hunting drops page. Every NPC in the same group have the same drop rate.
Note: Hunting drops chance decrease 10x if you are 10 levels or higher than the NPC you are hunting; this DOES NOT apply to Special Characters.
Note: The Hunting Boost can be bought from the Boon Ship in Sector 2 for 25 Boons. This will reduce the cost of hunting by 20% for 24 hours while the boost is active.
Sewer Rats
| One of the lowest forms of life in the hive, but vast in numbers. The rats create a problem for those in the slums. |
|
Drug Dealers
| Drug dealers of the slums. Commonly found in Sector 3. |
|
Slum Thugs
| Some would say they are lower than the rats. These thugs are a common sight in sector 3, wandering aimlessly and stealing. |
|
Residential Guards
| Civilian recruited guards of Sector 2, their main job is to fend off the poor people in the slums and maintain peace. |
|
Hive Police
| The hive police force is known for its corruptness, some say they are no better than the criminals they claim to fight. |
|
Hive Riot Police
| The hive police force is known for its corruptness, some say they are no better than the criminals they claim to fight. |
|
X-Corp Guards
| Armed guards of the infamous X-Corp, more powerful than the police and the main power behind all government. |
|
Senate Guards
| Guards of the halls of the senate, most are on the X-Corp payroll. They take no prisoners and tolerate no annoyance. |
|
X-Corp Bounty Hunters
| Notorious amongst assassins, the X-Corp Bounty Hunters are professional and merciless. |
|
Chamber Guards
| Guards of the secret chambers in the great halls of the syndicate. They answer to no senate or corporation. |
|
Hive Lord Bodyguards
| Most loyal of the chamber guards and defenders of the Hive Lord's throne room at the very peak of the hive. |
|
X-Corp Droids
| Deployed by X-Corp to hunt down their former Test Subjects, these ruthless machines must be steered clear of. |
|
Crystal Entities
| These entities exist in the same dimension as the Avatars, the crystals they are formed from hold great power. Crystal Entities can only be hunted by Avatars. |
|
X-Corp Markswomen
| Special mercenaries-for-hire that are under the employ of X-Corp to find and terminate the escaped test subjects. |
|
"Brotherhood of Blood" Quest
The first Legacy quest ever. Completing this gives a player high-level hunting options, such as Cerb, X-1025, Tyran, and Ventrix, as well as the 50+ hunting groups. To begin the quest, the 10,000c Chronicle of Blood must be purchased from Joe's Merchandise in Sector 3. The following NPCs can only be attainable through the Brotherhood of Blood quest:
Guard Dogs
| Patrolling the sanctuary these Guard Dogs have been injected with the Avatar Lords blood. Increasing their strength. |
|
Brotherhood Cultists
| Devoted followers of the Avatar Lord many of these Cultists have developed lesser Avatar abilities. |
|
Blood Crazed
| These cultists got addicted to drinking Avatar blood, and became mentally unstable. |
|
Sentinels
| These robotic goliaths roam the halls of the Sanctuary, reaching 7 feet in height they far out power most humans. |
|
Sanctuary Guards
| These stealth guards not only operate within the Sanctuary but all around the hive, hiding in the shadows. |
|
Brotherhood Avatars
| Some members of the brotherhood have now become Avatars themselves, although lesser in power than Tyran. |
|
"Shadow Hunter" Quest
The second Legacy quest. Completing this gives a player high-level hunting options, Hive Gatekeepers. It also opens higher tiered weaponry in the Off Plane. To begin the quest, the 12,500c Journal of a Shadow Hunter must be purchased from Joe's Merchandise in Sector 3. The following NPC can only be attainable through the Shadow Hunter quest:
Hive Gatekeepers
| Trained to guard the highest importance areas of the hive. Not much gets past them. |
|
Hunting Special Characters
In addition to hunting groups, you can also hunt special characters, commonly referred to as SNPCs. You can only hunt these characters once every 7 days, and if you do not kill them in the fight, they immediately heal back to full health (so you cannot wear them down). Special characters are specific for everyone, meaning that even though your friend defeated one 5 minutes ago, you can still fight that character. Drop percentages have been decreased accordingly since more of the Special Characters will be defeated everyday. Note: The drops listed are not necessarily all the drops possible. They will also commonly drop health items like Revives Kits, Large Medicines, First Aid Kits, etc. just like normal NPCs.
Note: All special NPCs from level 50 - 80 (Seraph, Cerb, Guardian: X-1025, and Tyran; excluding Shadow Hunter SPNCs) have a chance to drop a Chaos Armor; this chance increases as the level of the NPC increases. Therefore, Seraph has the lowest chance of dropping a Chaos Armor, while Tyran has the highest chance.
Note: The ability Fast Recovery reduces the wait to hunt special NPCs by 24 hours. This brings the wait down to 6 days, rather than the usual 7. The Hunting Boost, found in the Boosts section of the Platinum Store, reduces the wait to hunt Special NPCs by 24 hours. This, combined with the Fast Recovery ability, allows you to hunt Special NPCs every 5 days.
Note: The Hunting Pass can be bought from the Boon Ship in Sector 2 (for 60 boons) resets the special npc timer allowing you to hunt right away.
Assassin: Lisha
| Wandering the Sectors this ruthless assassin will kill anyone, if the price is right. Often employed by X-Corp to take care of lesser opposition, she has worked up quite a reputation amongst other assassins. |
|
Mob Boss: Big Al
| Working behind the scenes with X-Corp the Police and any other corrupt organizations he can get in contact with. Big Al is responsible for most of the large scale crime with in the Hive. |
|
Police Chief: Zaphar
| Running what is left of the police force in the hive, the Chief of Police takes more of a 'hands on' approach at fighting crime. Often found wandering Sector 3 hunting criminals, he is thought to be losing his sanity. |
|
X-Corp Founder: Sythe
| The founder of the notorious X-Corp company that runs most of the legal and illegal business with in the hive. Rumour has it that in his early scientist days Sythe conducted strength and intelligence increasing experiments on himself. |
|
Hive Lord: Seraph
| His origins are unknown, but the building of the hive was of his design. None have ever been powerful enough to challenge his rule, and even X-Corp bow to his power. Having lived over 200 years he still shows no signs of age. |
|
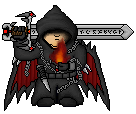
Gatekeeper: Cerb
| A dedicated disciple of Tyran, after years of drinking his masters blood he developed the unusual characteristic of ethereal wings. This lesser avatar is now the gatekeeper to the Brotherhoods Sanctuary below the hive. |
|
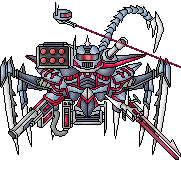
Guardian : X-1025
| This 8 foot high 6 legged robot was built as the guardian for the Brotherhood of Blood's sanctuary. It has been upgraded slowly over time and has a huge array of weapons. |
|
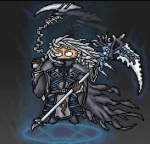
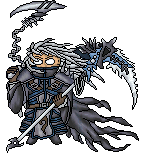
Avatar Lord: Tyran
| The first human to become an Avatar and leader of the Brotherhood of Blood. He has been alive for over 700 years exploring the stars and dimensions of this universe and as such has gained great power. |
|
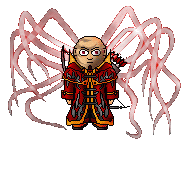
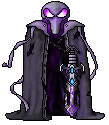
Observer: Ventrix
| Few have met the Observer and lived to tell the tale. He is known to traverse the timeless void. But nobody knows where he came from or what he wants. |
|
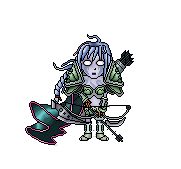
Test Subject 0: Aida
| Not much is known about her origins except that she was first seen escaping the scene of an explosion at an X-Corp facility with a masked male individual. She has recently been discovered attacking X-Corp personnel and facilities, causing large amounts of fatalities and collateral damage. |
|
Test Subject 1: Aiden
| Not much is known about Aiden except that he may be the one spotted alongside Aida during her attacks on X-Corp facilities. There have been conflicting reports about the extent of his strange abilities but one thing is for certain - he is dangerous. To find Aiden, go to the quests page. |
|
